Overview
Adding custom filters to FeatureFinder allows you to specify exactly how you want to filter your data. Just like the ability to add custom features, we added this function to give users the sort of freedom they’d have writing their own code—but without the hassle! It’s completely optional (FeatureFinder already comes with a set of standard filters), but if you’d like to learn how to add your own filters, you’ll find a brief tutorial below.
NOTE: To add custom filters to FeatureFinder, you must be comfortable programming in MATLAB.
Tutorial:
To demonstrate how custom filters can be added to FeatureFinder, we’ll go through the process for a moving average filter. The filter will use a 100 ms window and “mean absolute value” averaging.
- Run MATLAB.
- Click Open… under the “File” menu. Within FeatureFinder‘s home directory, open the “Filters” directory. Select “FilterTemplate.m” and click the Open button.
- The m-file (i.e., MATLAB script) will open in the Editor.

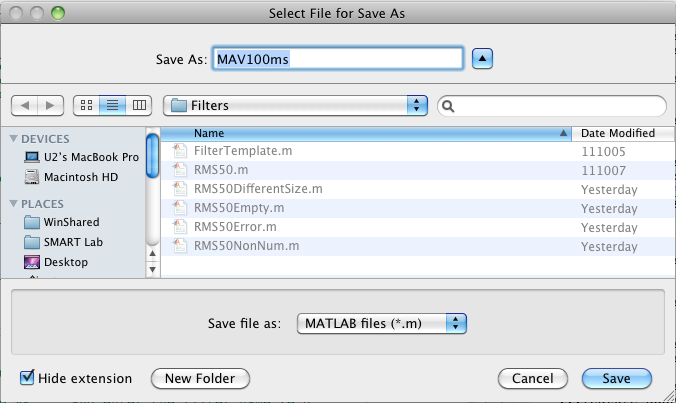
- Begin by re-saving the m-file with a new name (i.e., not “FilterTemplate”). This name will come up in the “Other filter” drop-down menu in FeatureFinder, so try and make it as meaningful as possible—but not too long. We’ll call our new filter “MAV100ms.” Click Save As… under the “File” menu to do this.

- The next step is to change the function’s name in the m-file itself (optional, but recommended):

- After we’ve re-saved the m-file and changed its name within the code, we can start writing our filter code!
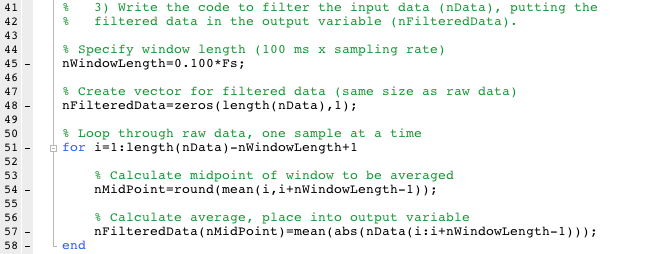
- First, we’ll specify our filter parameters. In this tutorial, that’s just going to be window length.
- The next thing we do is create a vector of the same size as the raw data called
nFilteredData (this name must be used). The filtered data must be the same length as the raw data, so this can be a good start for any filter.
- Finally, we’ll setup a loop to “slide the window” across our data, taking averages as it goes.

- Now that our filtered data is in the variable
nFilteredData, we’re done!
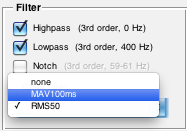
- Open up FeatureFinder, load any profile, and we’ll find our new filter in the “Other filter” menu!

NOTE: For sliding window filters, it’s much faster to use MATLAB’s filter command than a loop; however, the looping code is easier to grasp for new MATLAB programmers and so was used in this tutorial. Is there a particular filter or set of filters you’d like to see in FeatureFinder? Let us know!


